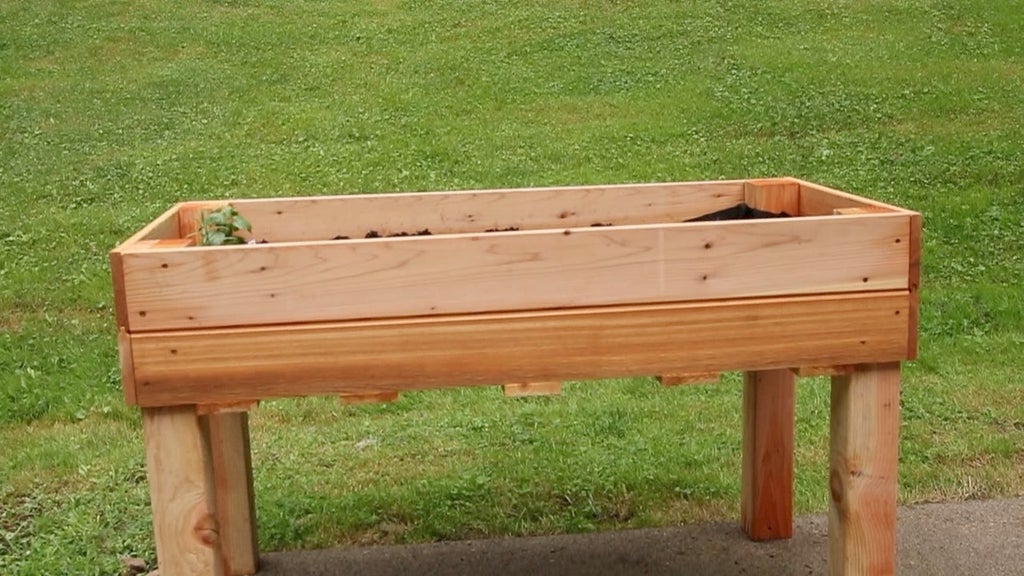
Elevated Garden Planter

This was a very simple DIY project that you can make in just a few hours. Last year we had a very nice garden with lots of things in it including lettuce. The only problem was that the rabbits also really enjoyed the lettuce. So this year I decide to make an elevated garden planter for my lettuce and herbs.
Step 1: Tools and Materials
TOOLS
- Circular Saw
- Table Saw
- Drill and Impact Driver
- Wire Snips
- Staple Gun
MATERIALS
- (3) 1x6x8 Cedar Boards
- (1) 1x4x8 Cedar Board
- (2) 4x4x8 Board (cedar if possible)
- 2” Wood Screws
- ¼” x ¼” Galvanized Steel Fencing Wire
- Landscaping Fabric
- Raised Bed Garden Soil
- Plants or Seeds
Step 2: Cut the Boards


The first thing I you will have to do is cut the boards you are using into the size you are wanting your planter to be. I first cut the cedar boards I used for the sides using a circular saw. I made my box two foot wide by four foot long. I cut 4 boards at 24” and 4 boards at 48” long. I actually used 1×6 paneling boards for the sides of my planter. The boards are tongue and groove and I used two boards on each side and each end of the planter box. I cut the tongue off of the top boards and the groove off of the bottom boards so the boards would be smooth on the top and bottom.
Then I cut the 4×4 boards to 30” long using a circular saw. My saw blade wouldn’t go all the way through board so I marked both sides with a speed square, cut one side, then flipped the 4×4 over and cut the other side.
Step 3: Attach the Boards to the Legs


Attaching the boards to the legs was pretty simple. I basically assembled the box upside down. First I used clamps and a speed square to attach a side and an end board to the leg making an L shape. Make sure when you do this you are checking that everything is lined up properly. This is why I used the speed square. I made two L shapes and then put them together by adding the opposite legs and attaching the boards to the legs. To attach them I pre-drilled so the wood wouldn’t split and then attached the boards using 2” wood screws. Once I attached the first row of boards around, I then put the second boards on top all the way around and attached it pre-drilling and screwing them to the legs.
Step 4: Add Wire to the Bottom to Hold the Dirt


Next I added the wire to the bottom of the planter but before I could do this I added 5 1×4 boards to stretch across the width of the planter box. This would help support the weight of the dirt. I pre-drilled and screwed the 1×4’s to the bottom of the planter spreading them out evenly. Then I flipped the box over and added the wire. I used ¼” x ¼” galvanized steel fencing for this. It was pretty easy to install. I just cut it to length using wire snips and then cut out where the 4×4 legs would need to be. I had to bend it and move it around a good bit to get it to fit where I wanted it to and then I used a staple gun to secure it in place.
Step 5: Fill With Dirt and Plant


At this point the planter was pretty much finished. I added a layer of landscaping fabric so the dirt would stay in the planter box. I used scissors to trim the access around the edge. After it was in place, I put 2 bags of gardening soil in the bed and then I added the plants. I just had a few herbs to put in mine and for the remainder of it I planted lettuce from seed. After doing this the planter box was complete!